With the rapid growth of WordPress websites and blogs, you will find yourself in need to set up a “Page Redirect” from time to time. In basic terms, a Page Redirect will allow you to forward an old page link (or permalink in WordPress terms) to a new link so that your visitors don’t land on a 404 Page (page not found) when the original page no longer exists.
As much planning as you initially do while setting your permalink structure, there will be times when you will need to modify some of your permalinks to accommodate new categories, landing pages, or other sections of your website. When that happens, knowing how to properly set up a Redirect in WordPress will come really handy.
In fact, you may already have some old links that are no longer valid and are currently generating 404 page errors. If you want to find out if your website or blog has any 404 errors that you’re not aware of, all you have to do is log in to Google Webmaster Tools, find the “Crawl” section on the left and then the “Crawl Errors” item of the submenu. See screen shot below. Google will show you right away the pages that is not able to index.
To see if your website has any 404 page errors, log into Google Webmaster Tools then go to the crawl section. In the Crawl Errors page, Google highlights any page of yours that Google is unable to index.
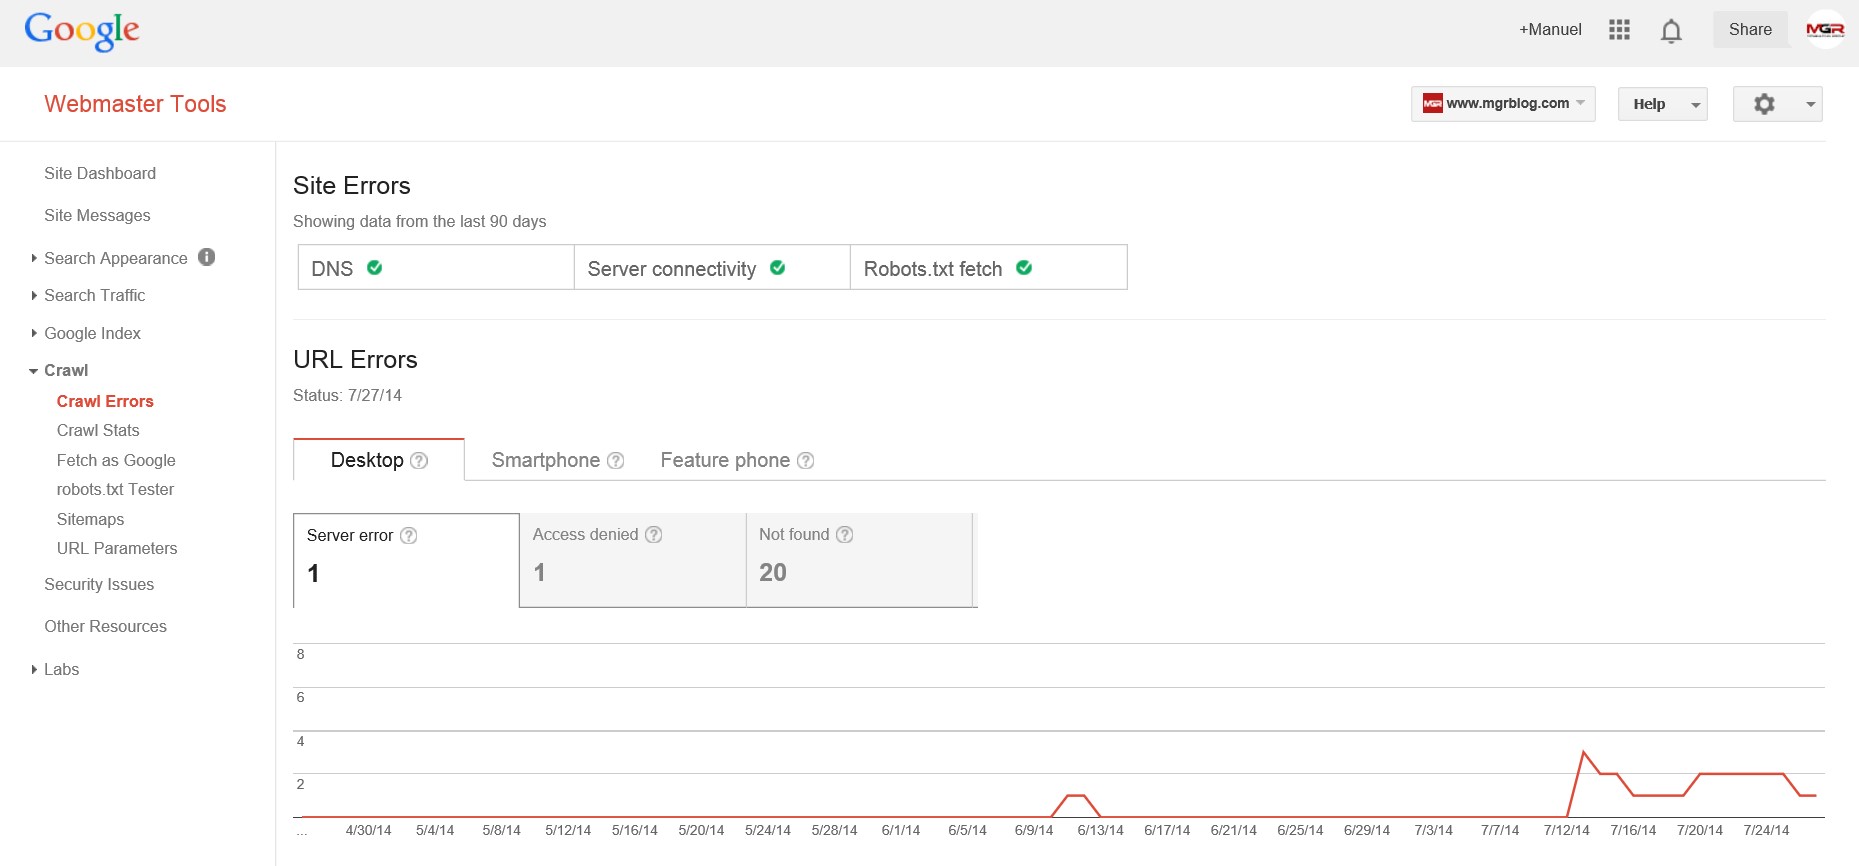
With Google Webmaster you can see each individual page link that is resulting in a 404 error so that you can take specific action on a page-by-page basis.
For the purpose of this article, we are going to focus on how to set up a URL to redirect to another URL on your WordPress website.
When to Use a 301 Redirect?
The most popular and commonly used type of redirect is referred to as a 301 redirect. The 301 redirect is also called a permanent redirect as it tells search engines that the page has permanently moved to a new location.
For that reason, Google and all other search engines always recommend webmaster to use this type of 301 redirect anytime a page moves permanently. Among other reasons, with a 301 redirect you will be able to maintain previously attained search engine rankings for that particular page as well as the same page rank after the page is redirected to the new URL.
In sum, I strongly recommend that you use a 301 redirect anytime that you change the URL of a page and want your page traffic and search engine results to remain unaffected.
How to Redirect a Page Using htaccess
Before we go deeper into this section I need to emphasize that the .htaccess file is the most critical file for the proper functioning of your WordPress website and as such, any minor error could have serious consequences. Just one small typo or command placed in the wrong place and your entire website could go down. That’s how serious it is. However, as intimidating as this might be, the solution is quite simple. BEFORE you make any edits to your .htaccess file, make a back-up of it. Simply copy it to your desktop and leave the original file there in case you need it later. Then, you can start modifying your .htaccess file ONE EDIT AT A TIME and check to make sure that everything continues to work properly. If not, simply revert to your backed up file and start over.
If you’re using an Apache server, you will be able to create 301 redirects using the .htaccess file. To do that, you will need to indicate the old location URL and the new location URL. Your code will look similar to this:
| Redirect 301 /oldlink.html http://www.yourwebsite.com/newlink.html |
If you’re trying to redirect a folder rather than a page, you can follow the same format. If you’re redirecting your entire website, you can do that directly at the Registrar or you can also do it by adding the code below to your .htaccess file:
| Redirect 301 / http://www.yournewwebsite.com |
As always, after you’ve made the changes to the .htaccess file, check to make sure that the redirects are working properly.
Using a WordPress Plugin to Redirect a Page
One of the great advantages of WordPress is the large variety of plugins that are available to perform a great number of programming functions without requiring the user to have a technical or programming background. If the above .htaccess method is too intimidating for you, all you have to do is install a “Redirect Plugin” that is readily available and have the plugin handle the setup of the redirects for you.
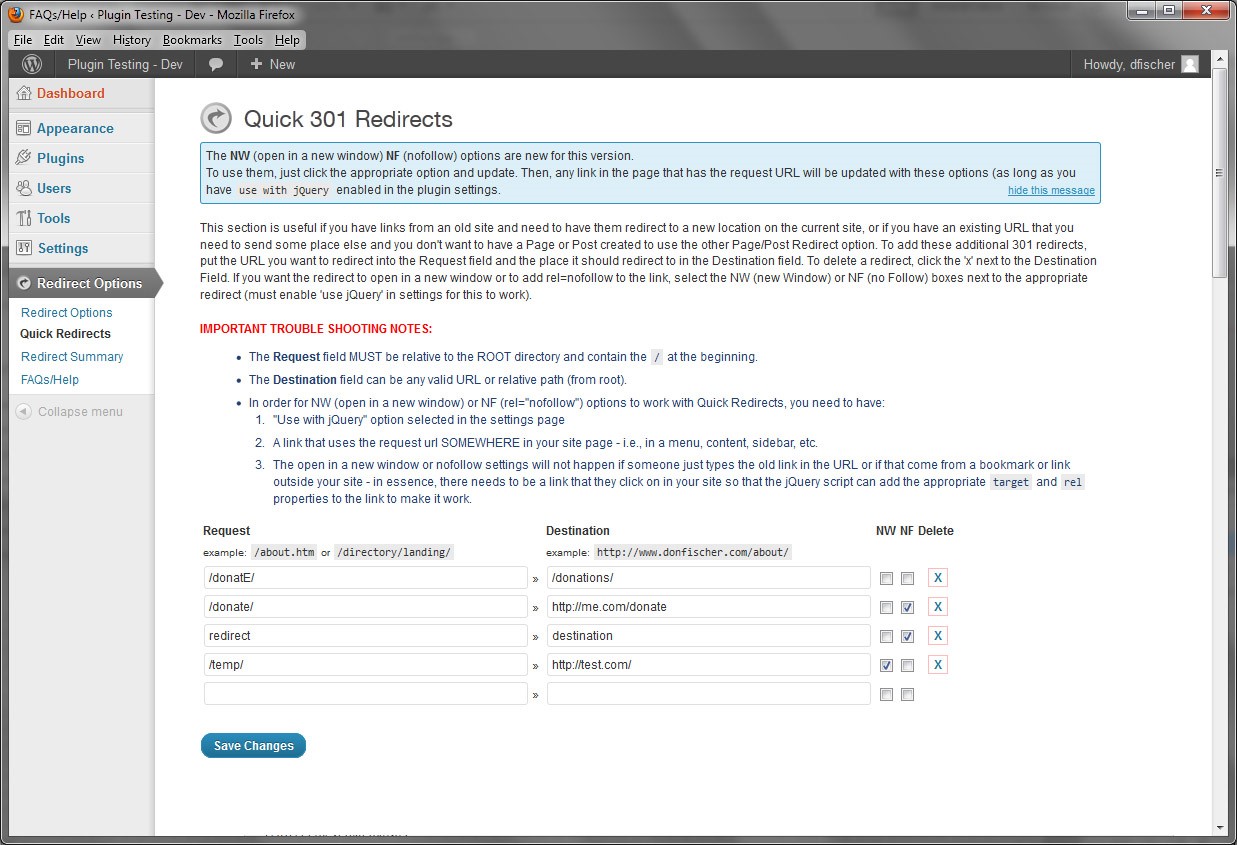
There are several plugin that can manage redirects but the one that we use at MGR is Quick Page/Post Redirect Plugin. In addition to handling the most commonly used redirects (301, 302, 307, etc. this plug in will also complete a number of other functions that you can see listed on the actual plugin information page.
Below is a screen shot from the actual plugin “301 Redirect” setup page. Again, the plugin page at the above link includes a number of screen shots for your reference.
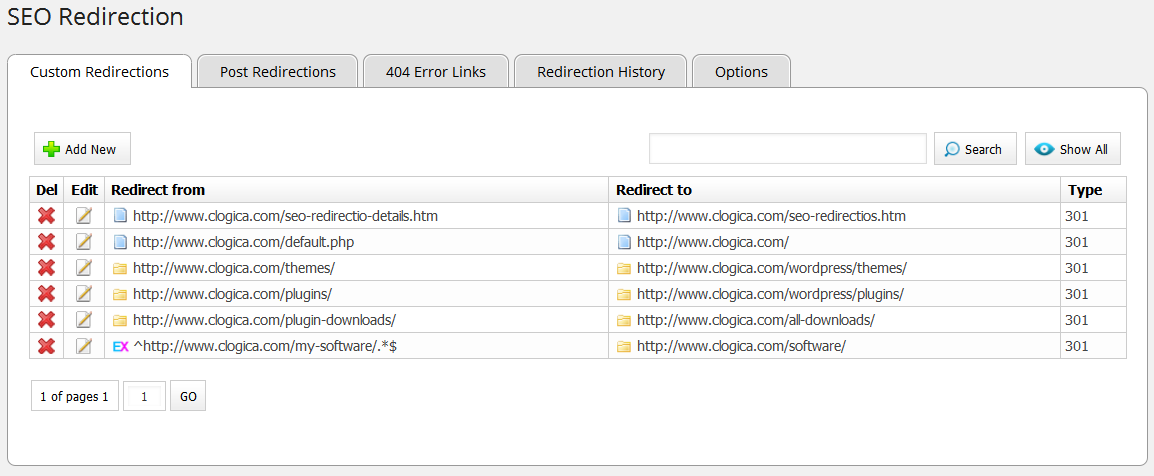
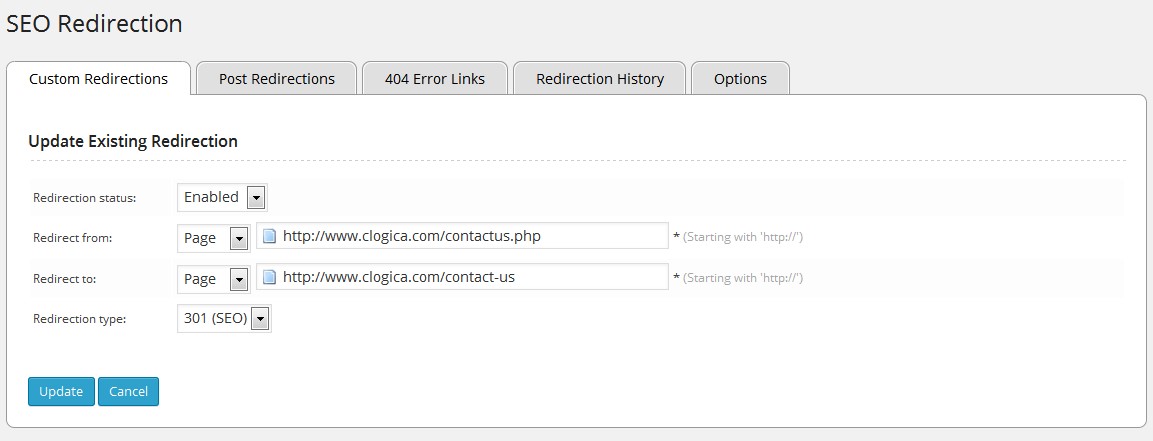
Another plugin that our MGR SEO Team likes to use is SEO Redirection Plugin. This plugin is one of the few plugins that supports wildcards. It also allows you to build redirections easily for your site. You can set up all types of redirections including 301,302 or 307 redirect; you can also monitor 404 error pages and redirect them in one mouse click. It’s quite easy and simple to use for users of all technical levels.
As you can see, redirecting pages shouldn’t be intimidating at all. Modern websites and marketing techniques will often require you to set up redirects from old pages to new pages without losing traffic, search engine rankings or worse yet, arriving at a 404 page.
If you need any assistance with the initial setup of your redirects, plugin installations or anything related to this topic, you can contact our MGR Web Services team anytime and we will be glad to assist you right away.
In the meantime, if you have any questions, you can also contact me directly or you can add your comments below this post.
Until next time, this is Manuel Gil del Real (MGR)


